Conceptualize, Design & Develop
From initial brainstorming to final execution, exploring the creative process across group projects and personal portfolio development.
1. Conceptualize
Choosing the Name for the Team
Short Summary
- Brainstormed many name ideas on sticky notes
- Narrowed them down through group voting
- Repeated the process several times
- Final decision: Twist Twist Twist
Introduction
Choosing the team name was the most challenging and time-consuming part of building our branding identity. We wanted a name that represented our creative, chaotic, and bold vibe.
Process
We began by brainstorming as many names as we could, writing them on sticky notes and placing them on the wall. Once we had a good amount, we voted to narrow down the options. More names kept coming, so we repeated the process multiple times. Eventually, we realized we were overthinking it and spending too long deciding, so we continued voting until only one name remained: Twist Twist Twist.
Reflection
This taught me how difficult group decision-making can be, but also how important it is to work together, stay patient, and recognize when it's time to stop searching for the "perfect" answer. It helped me understand the balance between creativity and efficiency so the project can move forward.

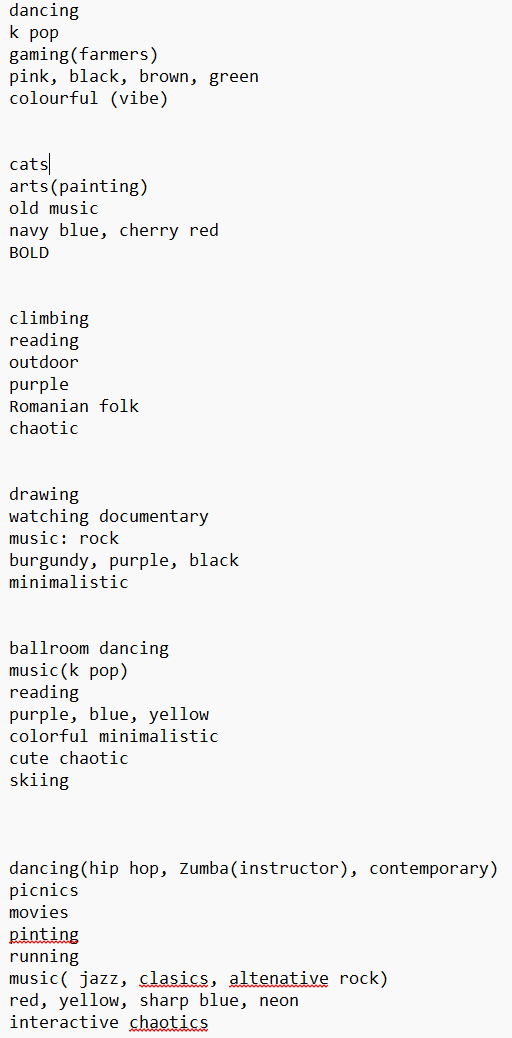
What Design Are We Going For?
Short Summary
- Team filled in a design-style questionnaire
- Compared results and found shared aesthetic goals
- Quickly aligned on a bold, chaotic, colorful style
Introduction
Before starting the actual design, we wanted to understand what visual direction fit us as a team.
Process
We completed a shared sheet with questions meant to help us understand each other's preferences. Most answers were similar: bold, chaotic, colorful, loud. We wrote these down and discussed them until it became clear that our tastes matched naturally, giving us a unified direction.
Reflection
This moment made later design decisions much easier. I learned how valuable it is to align as a team early in the process so the project has a strong, shared foundation.
For more details, check out Twist Twist Twist.
Portfolio: What's the Vibe?
Short Summary
- Developing a street vibe portfolio inspired by climbing, parkour, and skateboarding
- Inspiration comes from climbing websites, parkour videos, and early skateboarding style
- Focus currently on website structure; "magic" elements like collage planned
- Prototyping used to test ideas before full implementation
Introduction
For my portfolio, I wanted to go with a more street vibe.
Process
Inspiration comes from climbing websites, parkour videos, and early skateboarding style. The website currently focuses on structure; I still need to add my "magic" to it. I am considering adding collage elements, similar to what I used in the group project website, and am currently prototyping the idea to see if it adds what the website needs.
Reflection
Exploring different styles helps me see what fits my portfolio best. Prototyping allows me to test ideas before fully implementing them.
For more details, check out my video projects.
Why Am I Choosing This Theme?
- Theme: "Street vibe"
- Goal: To establish a foundation for a career as a sports videographer/photographer
- Reason: The theme aligns the portfolio's style with the visual style of my videos and future professional aspirations
Introduction
My portfolio will be a website displaying the videos and posters I made this semester. I am choosing the "street vibe" theme to ensure consistency with my visual work and align with my career goals.
Process
My dream for a future career is to be a sports videographer/photographer. This semester is the best opportunity to dive deeper into that career and create a foundation. I am choosing this theme because I really like the street vibe in my videos and want to share the same style on my website.
Reflection
The theme allows me to explore and showcase the visual style I enjoy. It helps build a foundation for my future career as a sports videographer/photographer.
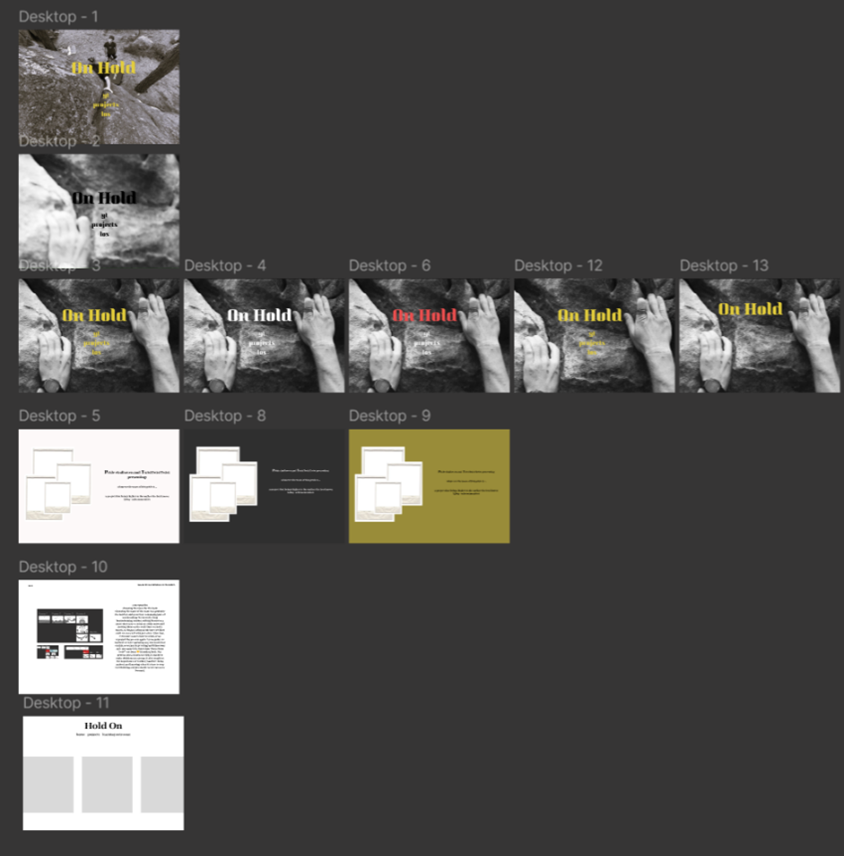
How Did I Come Up With the Name?
- Name: "On Hold"
- Process: Collaborative brainstorming in an unconventional setting (the gym)
- Outcome: Found the name by looking around and generating spontaneous words with friends
Introduction
I spent a lot of time deciding on the name for my project, and I hope this is the final one I am choosing.
Process
I went through the same process as with "TwistTwistTwist." I took a paper and went to the gym. I looked around and started saying words with my friends based on what we saw in the gym. One of the words that came up was "On Hold," and I thought that was the one.
Reflection
The process showed me the value of exploring ideas in different environments. Collaborating with friends helped me find a name that felt right.
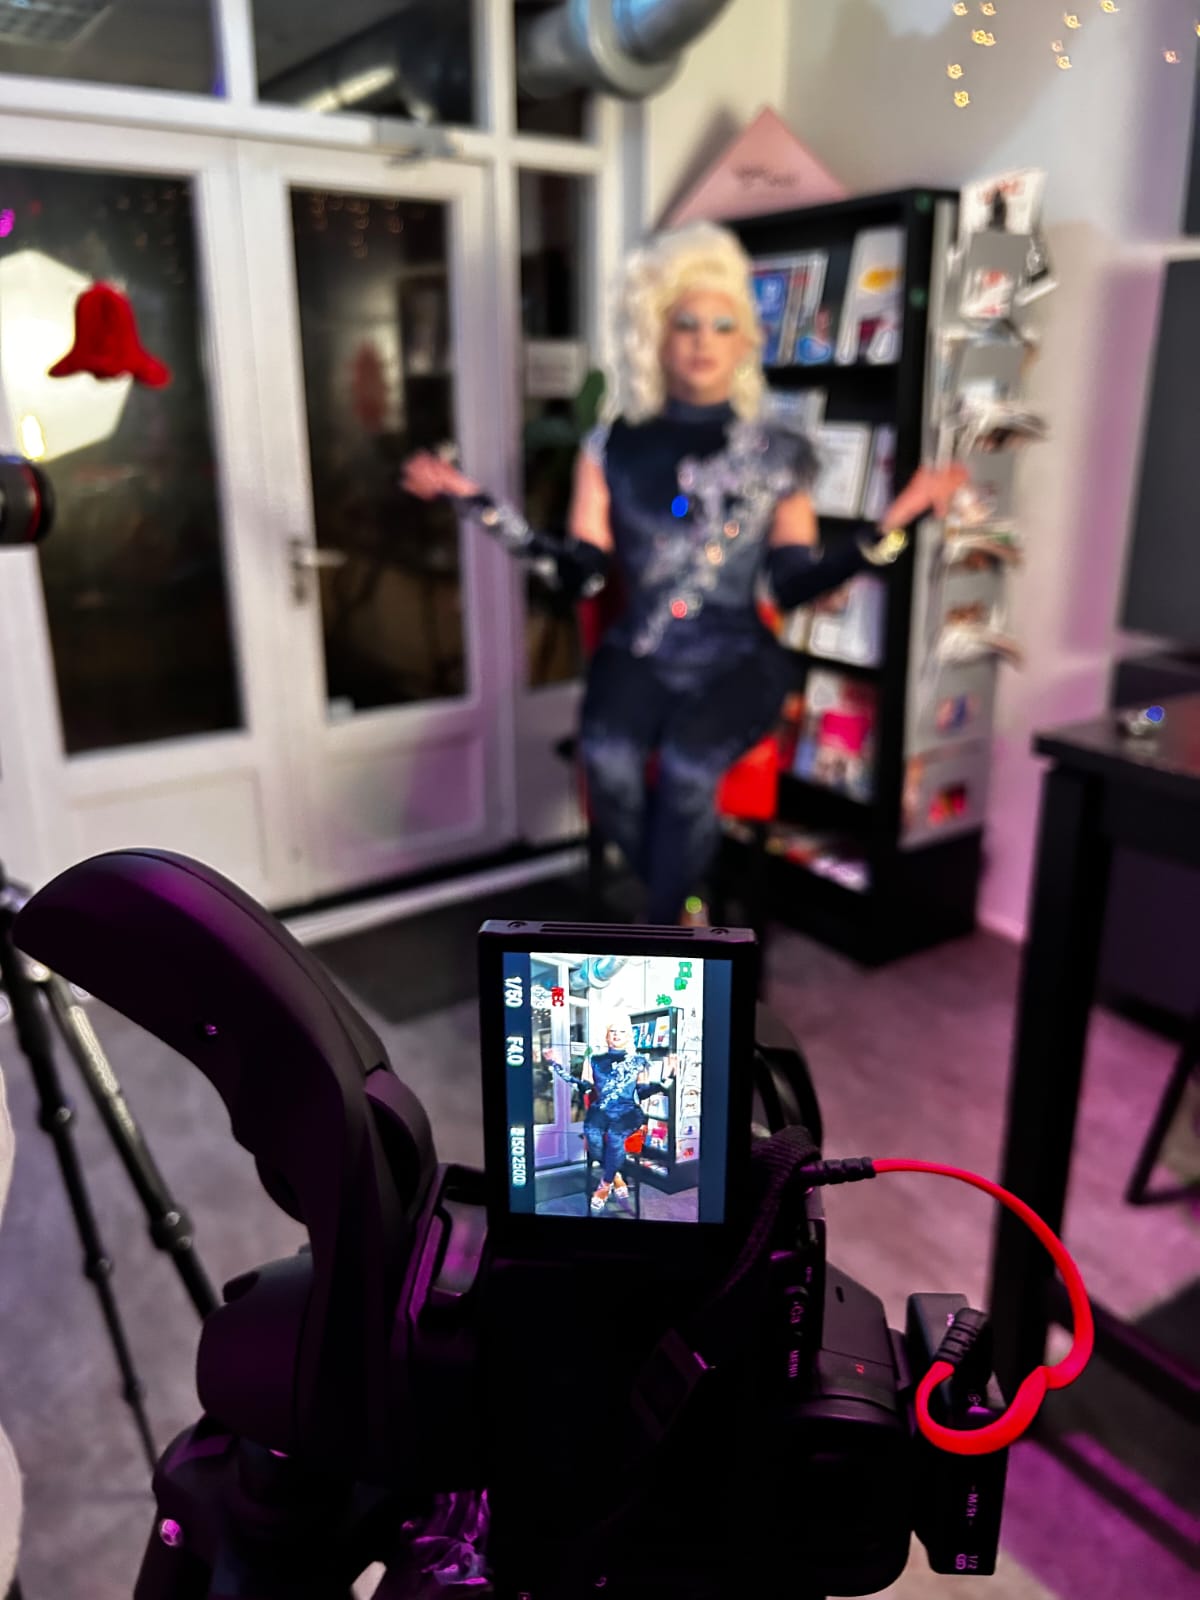
Eindhoven Pride Videos
Summary
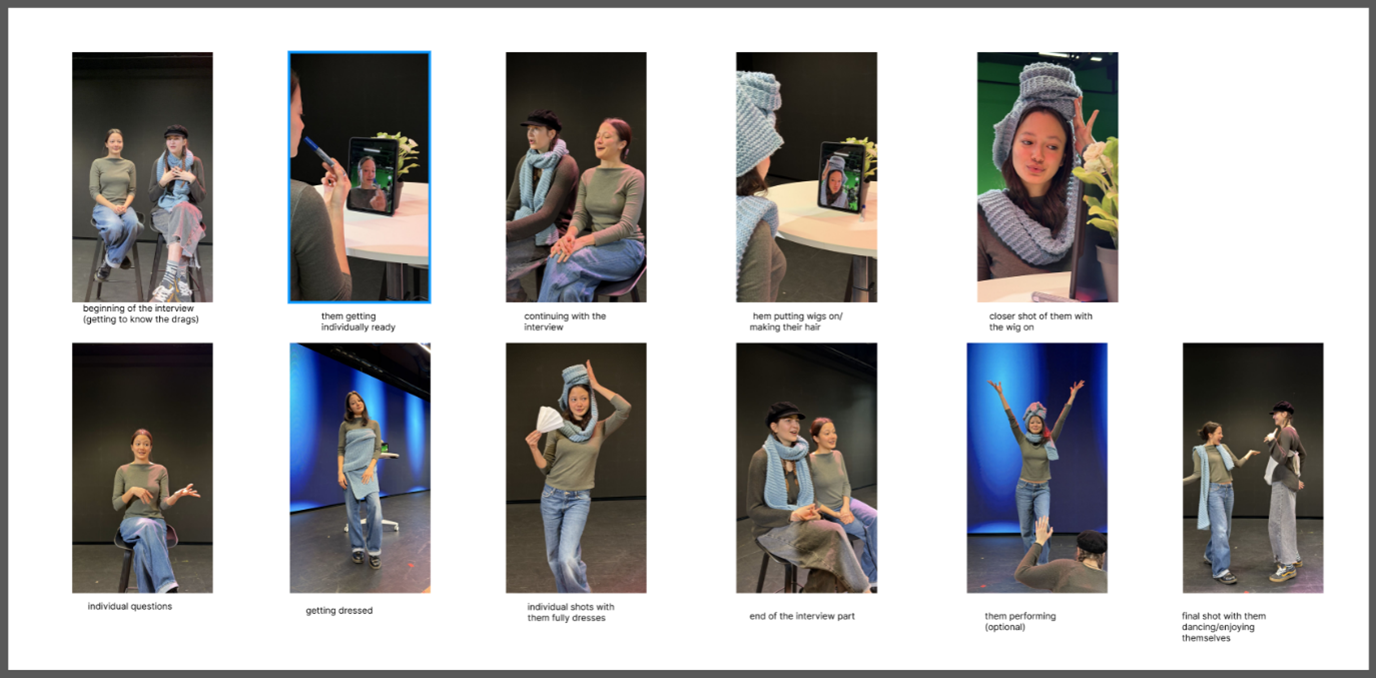
- Researched existing Pride videos for style and storytelling inspiration.
- Created storyboards to visualize each scene.
- Developed a shot list with camera angles, lighting, and audio.
- Incorporated feedback from teachers and teammates.
Introduction
Before filming, I focused on conceptualizing the videos. The aim was to create reels that highlight underrepresented LGBTQ+ sub-communities while promoting Eindhoven Pride, ensuring the content was engaging, educational, and well-planned.
Process
I began by researching existing Pride videos to understand storytelling, pacing, and effective shots. Using this as inspiration, I created storyboards, first with AI-generated images and later with real photos of participants to make the scenes more authentic. Alongside this, I developed a shot list detailing camera angles, framing, lighting, and audio requirements to guide filming. I regularly shared the storyboards and shot lists with teammates and teachers, adjusting them based on feedback to improve clarity and storytelling.
Reflection
This phase taught me the value of planning and preparation. Storyboards and shot lists made filming smoother and helped anticipate challenges. Research and feedback showed me how careful preparation improves creative decisions and ensures the videos communicate the intended message.
2. Design
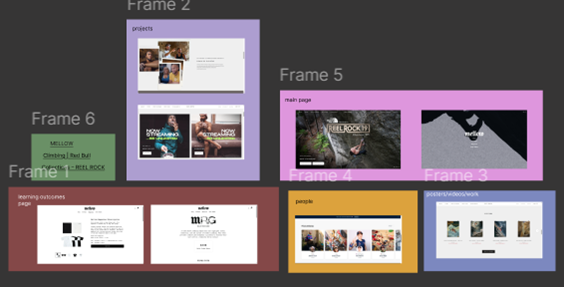
How Will the Website Look?
- Initial Idea: Surreal collage theme with animated elements
- Team Decision: The group voted for a different groupmate's design
- Integration: I was allowed to contribute my surreal collage style to the new "Services" page
Introduction
After finishing the moodboards and choosing colors and design ideas, we each created pages showing how we imagined the website could look.
Process
I wanted to include a surreal collage theme, as it would be fun to animate and make the website look more "crazy." The next day, we voted on which design fit the agency best. We all liked one of our groupmates' designs and chose it, making a few small changes. My design was considered too unusual for the full website, but the team still liked it. Later, we realized we needed a "Services" page, and I took charge of it, having the freedom to add my collages and animate them as I liked.
Reflection
This experience showed me the value of combining different ideas in a team. Even though my design wasn't chosen as the main one, I could still contribute my style, which made me feel included and creative.
For more details, check out Twist Twist Twist.
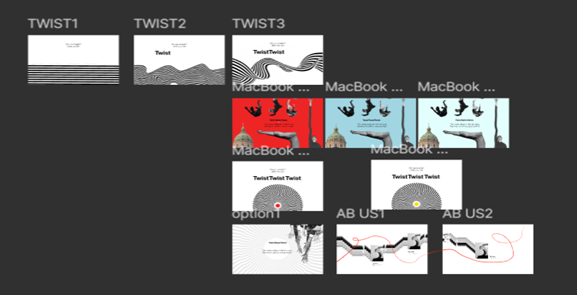
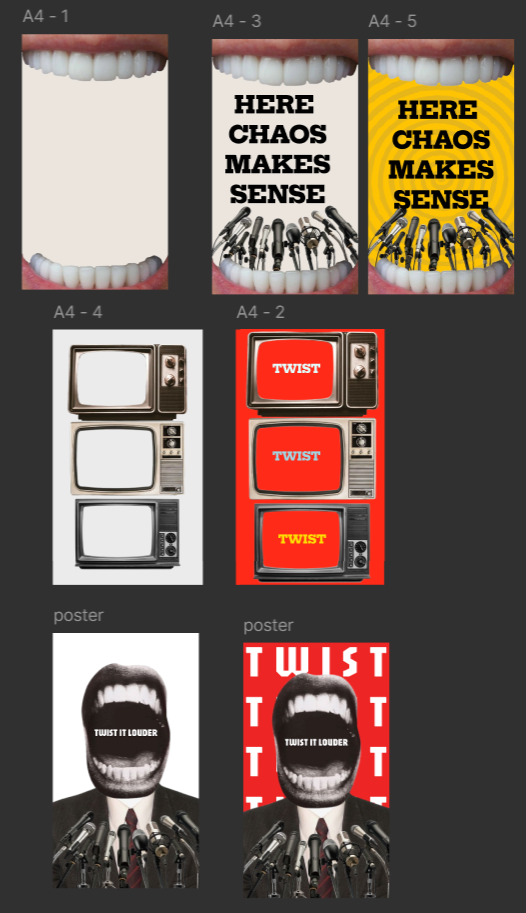
Posters? Logos?
- Posters: Explored surreal collage ideas, inspired by Vivienne Westwood and Desigual, based on group feedback
- Validation: Sought external feedback to refine the final poster
- Logos: Explored concepts, fonts, and created a low-fidelity design to gain experience
Introduction
Besides the web page, I wanted to take part in making the posters. I thought the collage idea might work even better on posters, so I decided to give it a try.
Process
I sketched some poster ideas and showed my groupmates what I had worked on, who were happy with some of the ideas and the "weirdness" that came through. Based on their feedback, I made more variations and combined everything into one final poster. For the Logo Exploration, I looked into icons, fonts, colors, and created a low-fidelity design as a starting point.
Validation
I asked one of my teachers for feedback on what changes could be made to the posters.
Reflection
I'm proud of the final poster and look forward to creating more in the next group project. While I'm less confident with logos, exploring concepts and making a draft helped me experiment creatively.
Designing the Portfolio
- Challenge: My habit was to design a little, then immediately code, which made the design process slow
- New Plan: Now, I focus on finishing all the creative design elements in Figma first
- Goal: Code the final website only after the design is perfect to ensure it exactly matches my vision
Introduction
This section details how I planned and developed the visual design for my personal portfolio website.
Process
I often prototype a small part and then immediately want to code it, because I think coding helps me see the final result better. However, this method has actually slowed down how quickly I finish the design. I have the main structure of the website ready. The next step is to concentrate fully on adding all the creative and fun elements in Figma. After that, I will code everything, making sure the final website looks exactly like my design vision.
Reflection
Working on both prototyping and coding helps me visualize the end product. However, now I know that focusing on the design phase first allows me to add all the details and the final creative "spark" before I move to development. Planning my steps clearly helps me achieve the precise website I imagined.
For more details, check out my video projects.
3. Develop
Coding the Website
- Role: Coded the Services page, which was my design
- Challenge: The overall website design changed slightly while I was sick, requiring me to adjust my page
- Lesson: Learned the importance of being flexible and collaborative when the team's project changes
Introduction
After the team finished the design, we started coding the website. Each developer was assigned a specific page. I was put in charge of the Services page, the one I had originally designed.
Process
First, I coded the page exactly according to the design the team had agreed on. Later, because I was sick during the last few days of development, the overall site design was slightly changed for a better look. This meant my page also needed some small adjustments to fit the updated site.
Reflection
Coding my own page allowed me to use my design ideas in a functional website. I also learned to be flexible and adapt my work when the larger team project changed. This experience taught me how important flexibility and working together are in a team project.
For more details, check out Twist Twist Twist.
Portfolio: Coding My Portfolio
- Method: Built the main website structure based on my Figma designs first
- Strategy: Added the core elements, planning to add the creative features later
- Outcome: Used testing during coding to make sure the live website matched the design
Introduction
After finishing the design for my portfolio, I started coding it to make the website functional and accessible.
Process
I coded the main structure of the website, following the designs I had created in Figma. I added the essential elements I wanted on the site first. I planned to code the more fun and creative features after the main structure was finished and stable. While coding, I constantly tested and adjusted the layout in the browser to see how the final website was looking.
Reflection
Coding the website helped me understand exactly how a design becomes a real, live webpage. It showed me how important it is to continuously test and adjust while writing code. Combining design and coding in this way helped me create a portfolio that is very close to what I first envisioned.
Making Climbing Videos
- Created two artistic climbing videos for my portfolio
- Researched inspiration from "Mellow" climbing brand
- Made storyboards and planned routes + angles
- Filmed using only a GoPro for flexibility
- Directed climbers to practice routes for angle testing
- Edited videos using skills developed from previous projects
Introduction
This semester I created climbing videos for my portfolio, which I want to become a space that showcases work connected to my passion for climbing. These videos were meant to be artistic and visually expressive rather than commercial. My main inspiration came from Mellow, a climbing website and brand that features high-level climbers and beautifully shot bouldering videos.
Process
I began by creating simple storyboards and studying the routes I wanted to film. This helped me decide what angles would best highlight the movement and style of the climbers. I intentionally chose to film with only a GoPro since it is light, easy to maneuver, and perfect for indoor lighting conditions—no extra equipment or audio setup was needed.
Before the actual filming, I asked Luca and Anami to climb the routes a few times so I could test whether the angles worked and whether the route suited their climbing style. Once everything aligned, I started filming and gathered multiple takes to have flexibility during editing.
After filming, I edited the videos. This editing process was smoother than earlier projects because of the experience I gained from previous shoots, and I could apply techniques I had already practiced.
Reflection
This evidence shows my personal leadership because I took initiative to create portfolio pieces outside of any group assignment, combined my passion for climbing with media creation, and used previous mistakes and experiences to work more efficiently. I also led the planning, directing, and execution entirely on my own, which strengthened my confidence in creating independent projects.

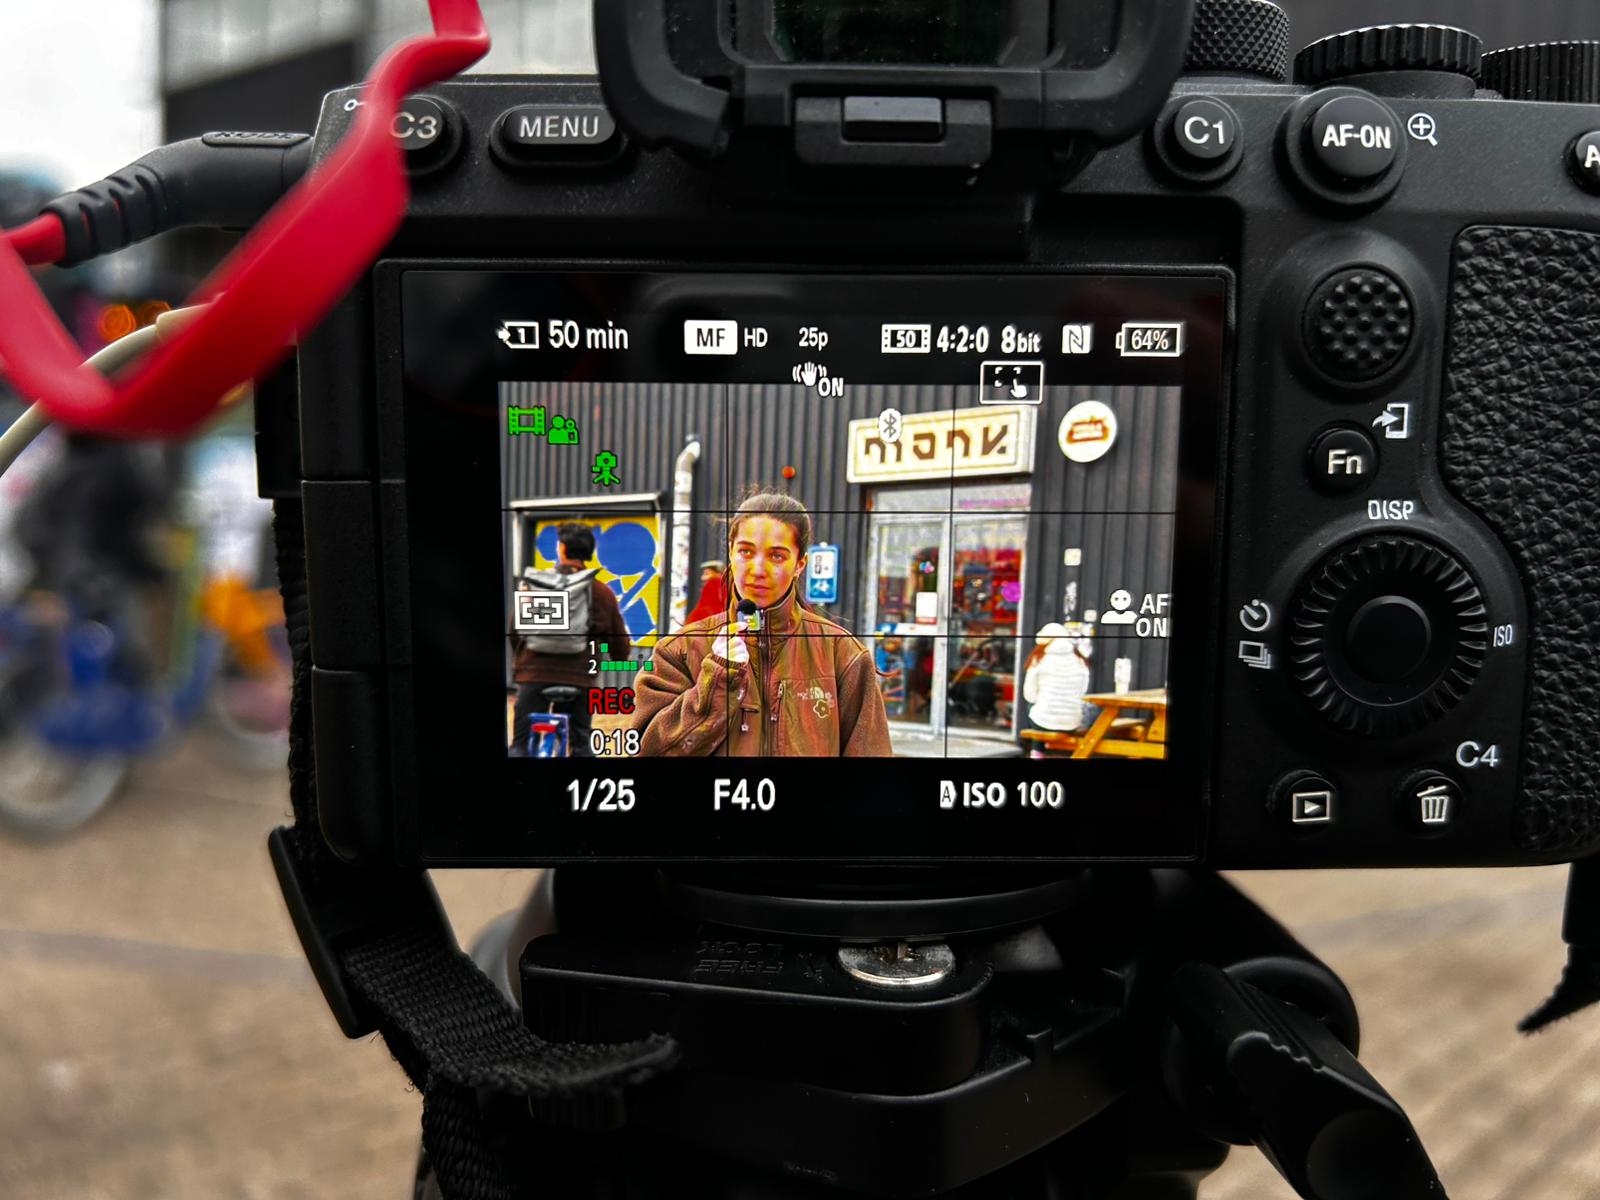
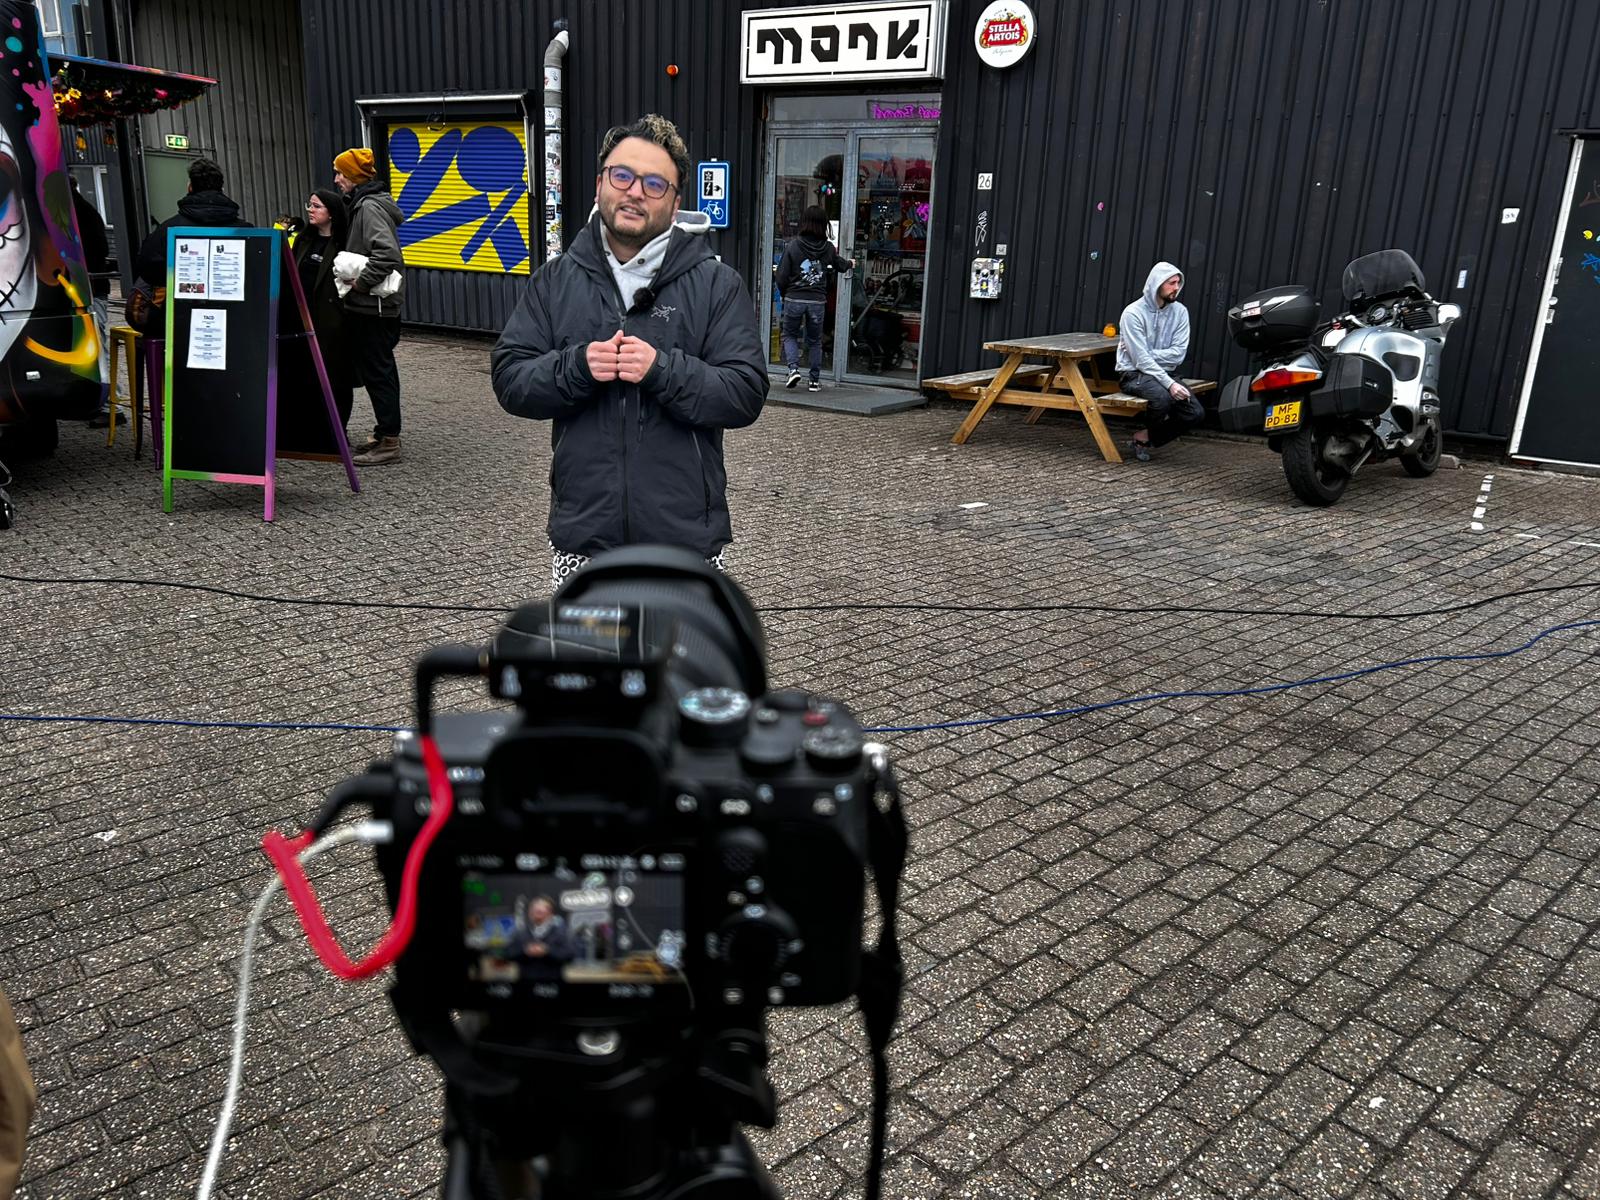
Videos for Monk
- Filmed and edited instructional videos for Monk climbing gym
- Researched equipment and learned to use lav mics
- Created multiple versions of each video
- Solved audio issues with teacher support
- Received positive feedback and got invited to a new project
Introduction
The Introduction to this project began when Guido invited me to create tutorial videos for the Monk climbing gym. He chose me because of a climbing-related project I worked on last semester, which already felt like a meaningful step in my development.
Process
During the Process, I researched what gear I needed — a camera, tripod, and lavalier microphones. Because I had never used lav mics before, I watched many tutorials to learn how they work and what common mistakes to avoid. I also watched several videos similar to what we wanted to create, which gave me inspiration for framing and editing.
On the filming day, I set up the gear, chose a shot together with Guido, and recorded all necessary footage. After filming, I organized everything into folders to keep the editing workflow smooth. I made two versions of each video: a raw version and a more edited one with transitions and guiding text. Whenever I wasn't sure about something, I searched tutorials or asked Guido for feedback to ensure the style matched his expectations.
Validation
There was clear Validation in this project. Guido consistently checked the edits and approved or commented on the changes I made. When I encountered a serious audio issue (a beeping noise), I researched extensively but eventually went to a teacher for support. They helped me identify mic interference as the cause, and we solved it using an AI audio tool. The biggest validation came when Guido invited me to join another project in Amsterdam involving interviews with world-class route setters.
Reflection
In Reflection, this experience was an important milestone. It taught me how to troubleshoot audio problems, use new equipment, communicate professionally, and organize my workflow better. I realized how important it is to ask for help when needed and how professional feedback can push a project to a higher level. This project confirmed that this is the career path I want to pursue.
For more details, check out my video projects.

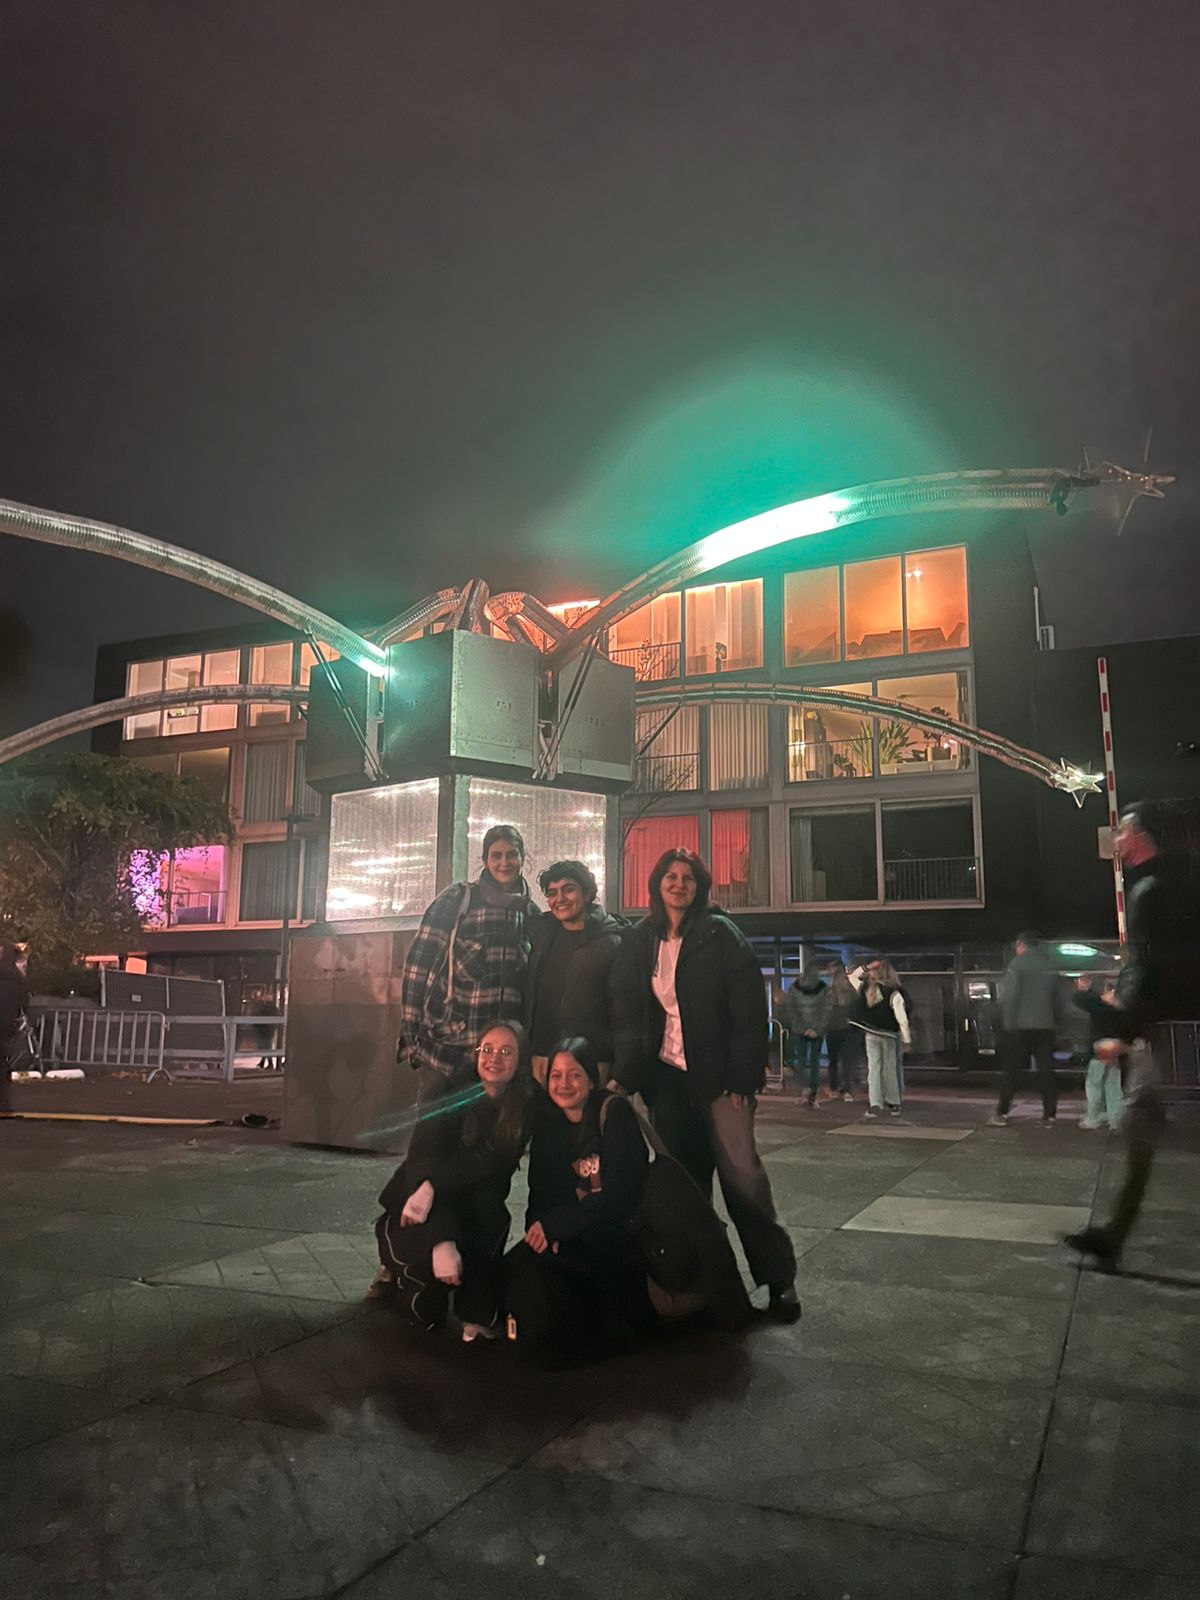
Filming for Glow
- Filmed B-roll for a Fontys installation for social media
- Met creators to understand the concept
- Researched gear and planned a shot list
- Applied workshop knowledge during night shooting
- Strengthened group cooperation and independence
Introduction
For this Glow project, our Introduction began with taking on the task of filming the B-roll for a Fontys student installation that would appear on the Fontys social media channels. Before starting anything, we met with two of the creators to understand the meaning behind their work. This gave us a better idea of the emotional tone and message we needed to capture.
Process
The Process started with researching what gear would work best for low-light filming and talking with teachers from ISSSD about our options. Some teammates also visited the structure beforehand to get a sense of the environment and decide on potential angles. We created a rough shot list, and on the filming day, we arrived early, picked our angles, and used the camera settings we had learned the week before during the workshop. Since it was dark, we had to manually adjust the cameras based on our workshop knowledge, especially regarding lenses and exposure. We shared the gear so everyone got hands-on experience.
Validation
There was also Validation through the workshop and teacher guidance, which confirmed we chose appropriate gear and used it correctly.
Reflection
In Reflection, this experience felt like a rehearsal for future larger projects. Filming outside the school environment made us feel more independent and professional. I realized how much preparation matters — even a rough plan makes a huge difference. I also learned how important it is to understand the story behind what you're filming, not just the technical side. The research, teamwork, and real-life practice gave me confidence and taught me a lot about visual storytelling.
Amsterdam Event
- Planned and executed filming and photography at a climbing event
- Applied visual composition and technical camera skills
- Created professional media content under real-world conditions
Introduction
After collaborating with Guido on a MONK project, I attended a climbing event in Amsterdam, featuring top route setters and athletes. My goal was to document the event professionally through interviews and action photography.
Process
I planned the setup at home, selecting and testing all the gear to ensure a smooth workflow. At the event, I positioned cameras and scouted angles to capture dynamic and engaging shots. I filmed interviews with route setters, athletes, and organizers, guiding them on microphone use. During the finals, I photographed the athletes, adapting camera settings and angles quickly to get the best shots despite a crowded, fast-paced environment.
Reflection
This experience strengthened my ability to conceptualize and create professional media content in real situations. It also taught me how to combine planning, technical skills, and creative choices to produce compelling visuals.
For more details, check out my video projects.
Prototype Presentation
- Created a video for the project showcase using NPO filming footage and animated logo ideas
- Picked and arranged A-roll and B-roll shots to tell the story clearly
- Showed a professional and complete prototype to teachers and students
Introduction
For the project showcase, we wanted to present our prototype in a way that clearly showed our ideas. We decided to use footage from the NPO filming and our animated logo and theme reveal video.
Process
I edited the video myself. I chose the best A-roll and B-roll shots and put them together in DaVinci Resolve. I made sure the video told the story of our project in a clear and organized way. This involved thinking about which shots to use and how to arrange them so the video looked professional and engaging.
Reflection
This experience shows LO1 because I took our project ideas and turned them into a finished video. I made creative decisions about what footage to use and how to arrange it, showing that I can make professional media products that communicate ideas clearly.
For more details, check out our project for Eindhove Pride
Eindhoven Pride Videos
Summary
- Filmed interviews and B-roll footage.
- Adapted to on-set challenges like lighting and location constraints.
- Edited videos through multiple iterations, refining pacing, music, and color.
- Added translations and subtitles for accessibility.
- Shared drafts with stakeholders and incorporated feedback.
Introduction
After conceptualization, the development phase turned our storyboards and shot lists into polished videos. This involved filming, editing, and refining content to make the reels engaging, educational, and visually cohesive.
Process
Filming included capturing interviews and supporting B-roll, focusing on framing, lighting, and sound, while adapting to location and technical challenges. Editing involved experimenting with pacing, music, transitions, and color grading to achieve the desired emotional effect. Interviews were translated and subtitled for a broader audience. Drafts were shared with teammates and stakeholders, and revisions were made iteratively until the final videos aligned with our vision for educational and promotional content.
Reflection
This phase showed me how to apply professional media production techniques in practice. I learned to solve problems on the spot, collaborate effectively, and make creative decisions while keeping the audience in mind. Iterating through edits highlighted how refining content multiple times is key to clarity, engagement, and impact.